View import information
The import details page displays after application data is imported. You can also return to this page at any time to view detailed information about a previous import.
To view import information, complete the following steps:
-
Go to the Manage menu and select Applications.
-
Select the application. The Application Details page is displayed with the Imports tab selected.
-
Select the import for which you want to see more detailed information. The import details page is displayed with the following tabs:
- Summary
- User Changelog
- Group Changelog
- Import Log
View an import summary
The Summary tab provides detailed information related to the import. The left side of this tab is used to show import details such as the status, the file used to import data, and the date the import was completed. If an import results in new privileges, an alert message is displayed.
The right side of this tab summarizes the changes that occurred during the import such as the number of new users, the number of new privileges, and the overall percentage of change. For a detailed list of the additions and changes select the User Changelog tab or Group Changelog tab.
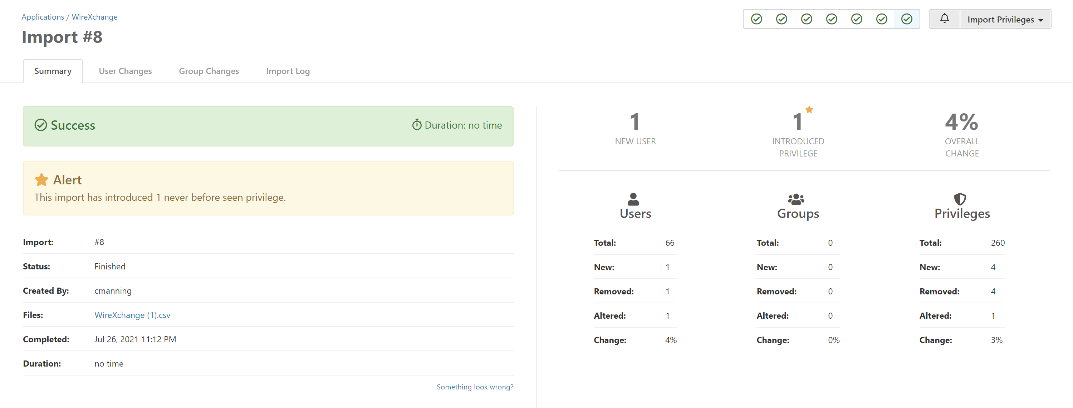
Selecting the file name link allows you to download a copy of the exact file used to import data.
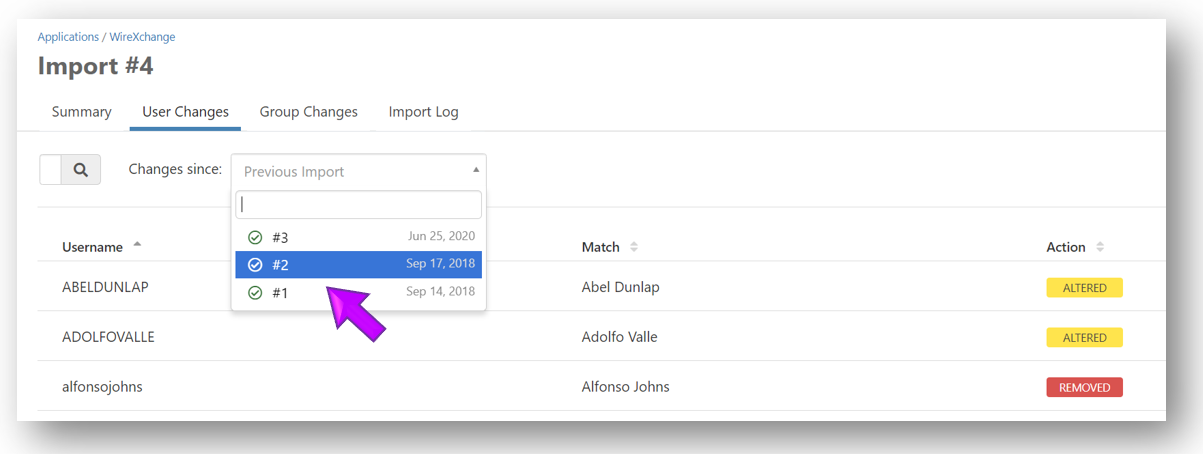
View the user changelog
The User Changelog tab allows you to see a list of all users that have been added or changed as a result of new data being imported. If you've assigned risk ratings to permissions within the application, the Risk Elevation column indicates whether the import resulted in privilege changes that elevated risk.
To see a detailed view of the user's privileges as compared to a previous import, select the user within the list. The details panel displays the user's privileges before the import (the Was column) and after the import (the column with the import number).
By default, you'll see the changes that have occurred as of the previous import. To see changes compared to a different import:
- Select the Previous Import field and then select the import you'd like to use as a comparison
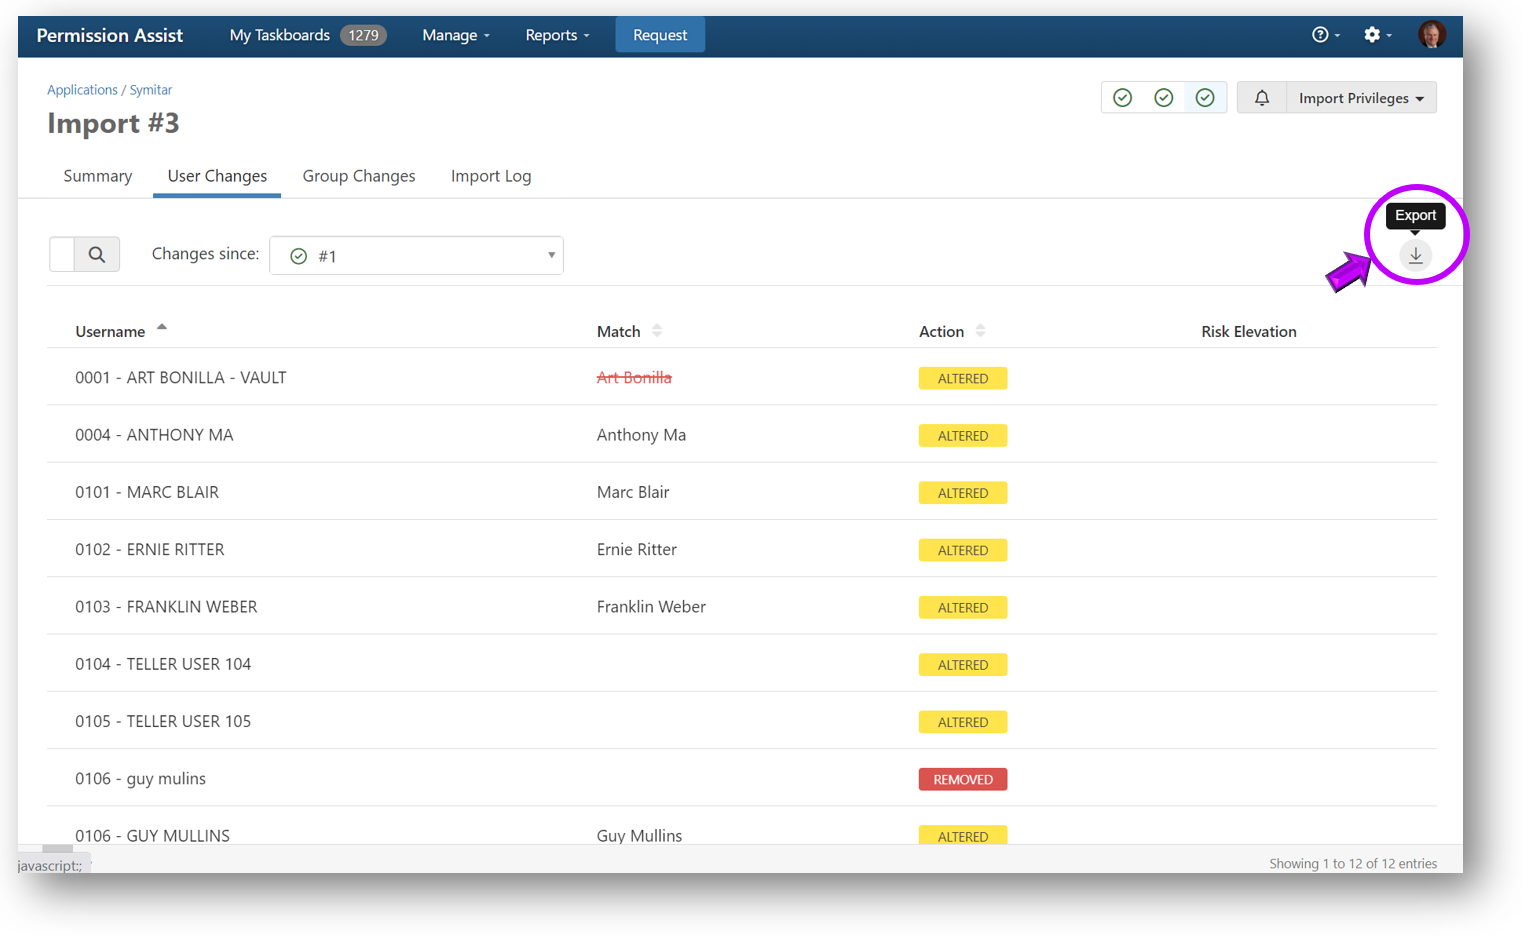
Export user changes data
User changes data can be exported in either Excel or PDF format. To export the data:
- Select the Export button in the upper right corner of the tab. The Save As window appears, allowing you to save the file to the location of your choice
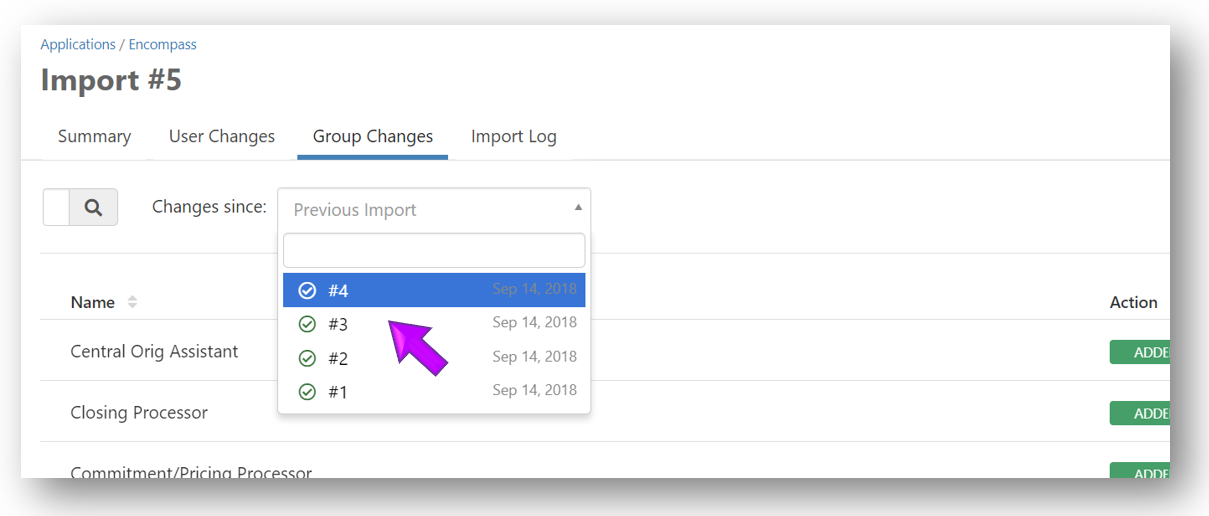
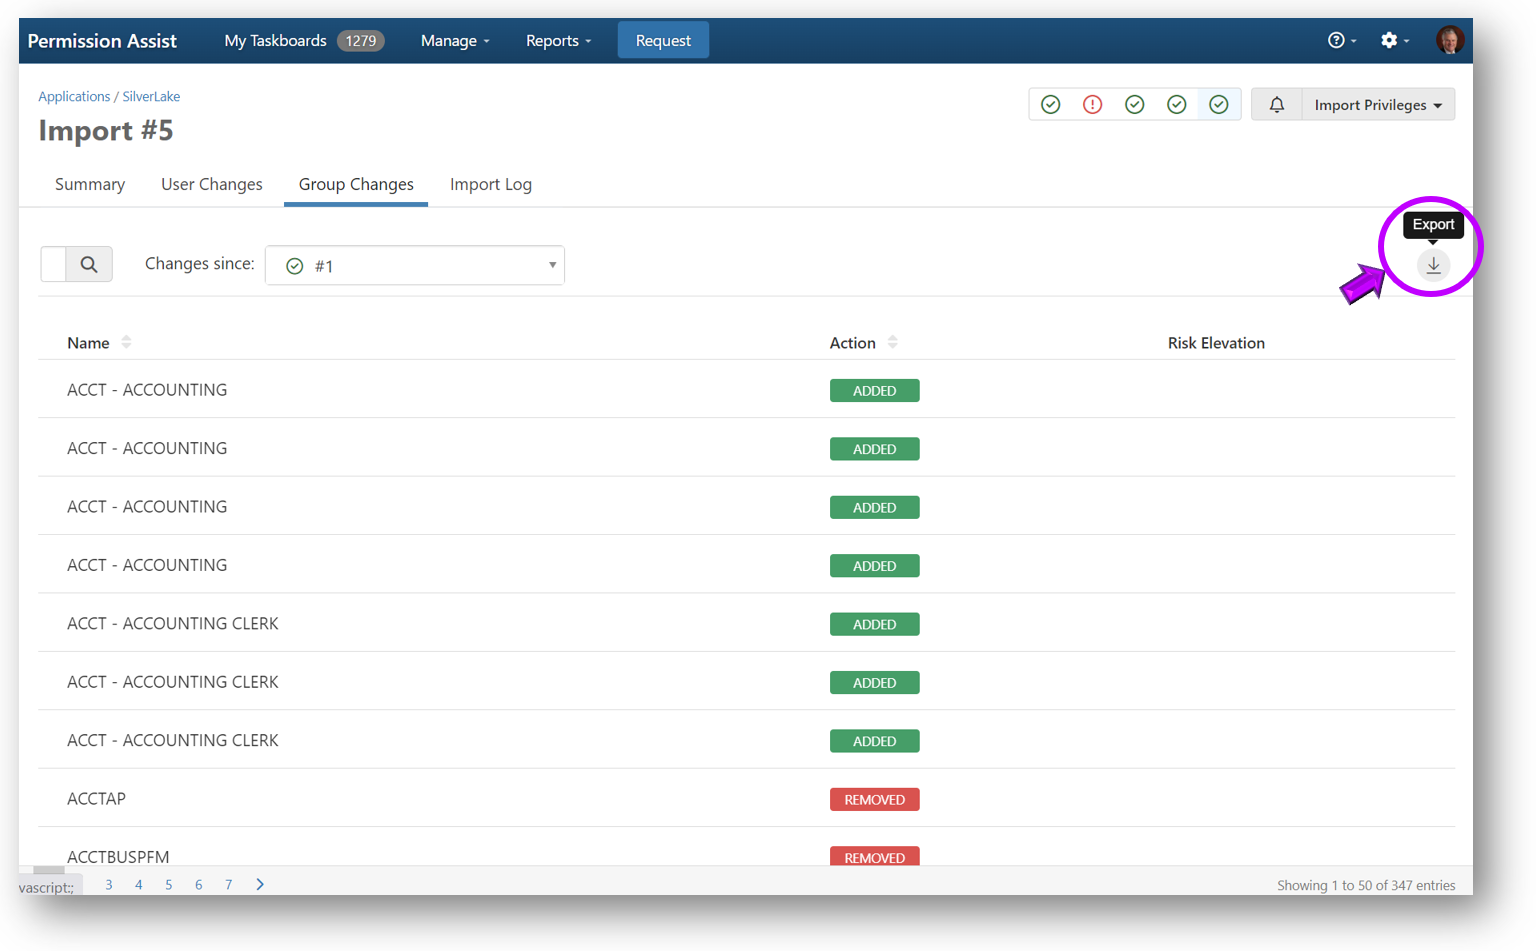
View the groups changelog
The Group Changelog tab allows you to see a list of all groups that have been added or changed as a result of new data being imported. If you've assigned risk ratings to permissions within the application, the Risk Elevation column indicates whether the import resulted in privilege changes that elevated risk.
To see a detailed view of the group's privileges as compared to a previous import, select the group within the list. The details panel displays the group's privileges before the import (the Was column) and after the import (the column with the import number).
By default, you'll see the changes that have occurred as of the previous import. To see changes compared to a different import:
- Select the Previous Import field and then select the import you'd like to use as a comparison
Export groups changelog data
Group changes data can be exported in either Excel or PDF format. To export the data:
- Select the Export button in the upper right corner of the tab. The Save As window appears, allowing you to save the file to the location of your choice
View the import log
The Import Log tab allows you to see system events that are logged during the import. In the event an error occurs during an import, this log can help you see what happened so the issue can be corrected.
Need help solving the problem? Just follow the step-by-step instructions to create an encrypted diagnostic file and send it to our support team using our secure support portal.
Create an encrypted diagnostic file and send securely to Continuous
In the event an error occurs during an import, a message is displayed indicating something went wrong.
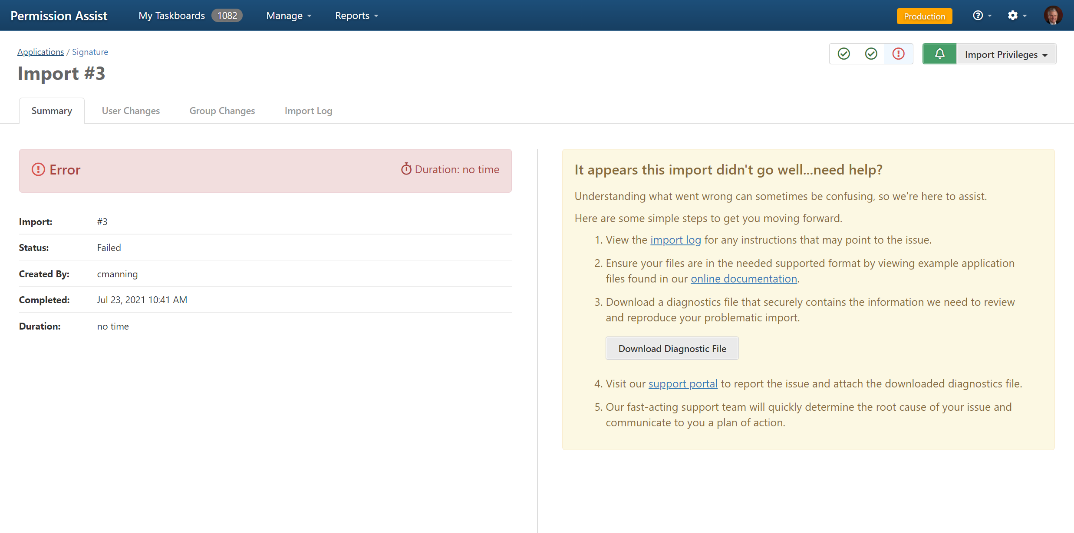
If you are unable to determine what's going wrong by looking at the import log, we're here to help! In these situations, it's likely that our Continuous support staff will ask you to send an encrypted diagnostic file securely through our support portal. To safely and securely send this file, complete the following steps:
Warning
Although this file is secured, it does contain detailed information that is required to simulate portions of your environment in times of need and should be handled appropriately. Do not create this file unless instructed by Continuous support staff and never send this file via email.
-
Select the Download Diagnostic File button (under step 3 within the "It appears this import didn't go well... need help?" message). The diagnostic file is created and the Save As window is displayed.
-
Save the file to a location that is easy to remember.
-
Select the support portal link (under step 4 within the "It appears this import didn't go well... need help?" message). The Continuous website - All Hands On Deck! page opens.
-
Select the Support Portal button.
-
Select Report a Problem. Enter the form information, making sure to attach the diagnostic file and then select Create. A support ticket is created and the file is securely sent to our Continuous support team.
-
Delete the diagnostic file from the location it was saved in step 2. The support ticket is created and the file is securely sent to the Continuous support team.