Remediation
The Provision Team manages access requests created during the review process. For each review, your goal as a Provision Team member is to complete remediation items using a three-step process:
- Open the Change Management Taskboard
- Select an access request
- Complete the changes and mark the request as resolved
Step 1: Open the Change Management Taskboard
The Change Management Taskboard is where you work on access requests created as part of a review. To open the Change Management Taskboard:
- Select Outstanding under the Access Requests heading on the Home page, or
- Go to the My Taskboards menu and select Access Requests
The Change Management Taskboard is displayed with a list of outstanding requests on the right.
Step 2: Select an access request
Select the request you want to work on from the list. The request details page is displayed, allowing you to review the information related to the request.
Step 3: Complete the changes and mark the request as resolved
-
Review the information on the Info tab to understand the request and the change controls that are required. The Info tab is displayed by default after selecting a request.
-
Select the Details tab to view the application user account information and the requested permission changes.
-
Select the Provisioning tab to review the provisioning instructions. If the application is integrated with Permission Assist using a read/write connector, you can use Permission Assist to automate the application changes.
If the application is not integrated with Permission Assist, the Provisioning tab provides detailed instructions (when available) for making the requested changes within the application. Not all applications have provisioning information. To discuss integrating an application or adding provisioning instructions, contact Support.
-
(Optional) To add a comment to the request: a. Select the Comments tab. b. Select the Add a comment link. The Add Comment window is displayed. c. Enter a comment and select the Save button.
-
Select the Info tab.
-
Select the I Resolved button.
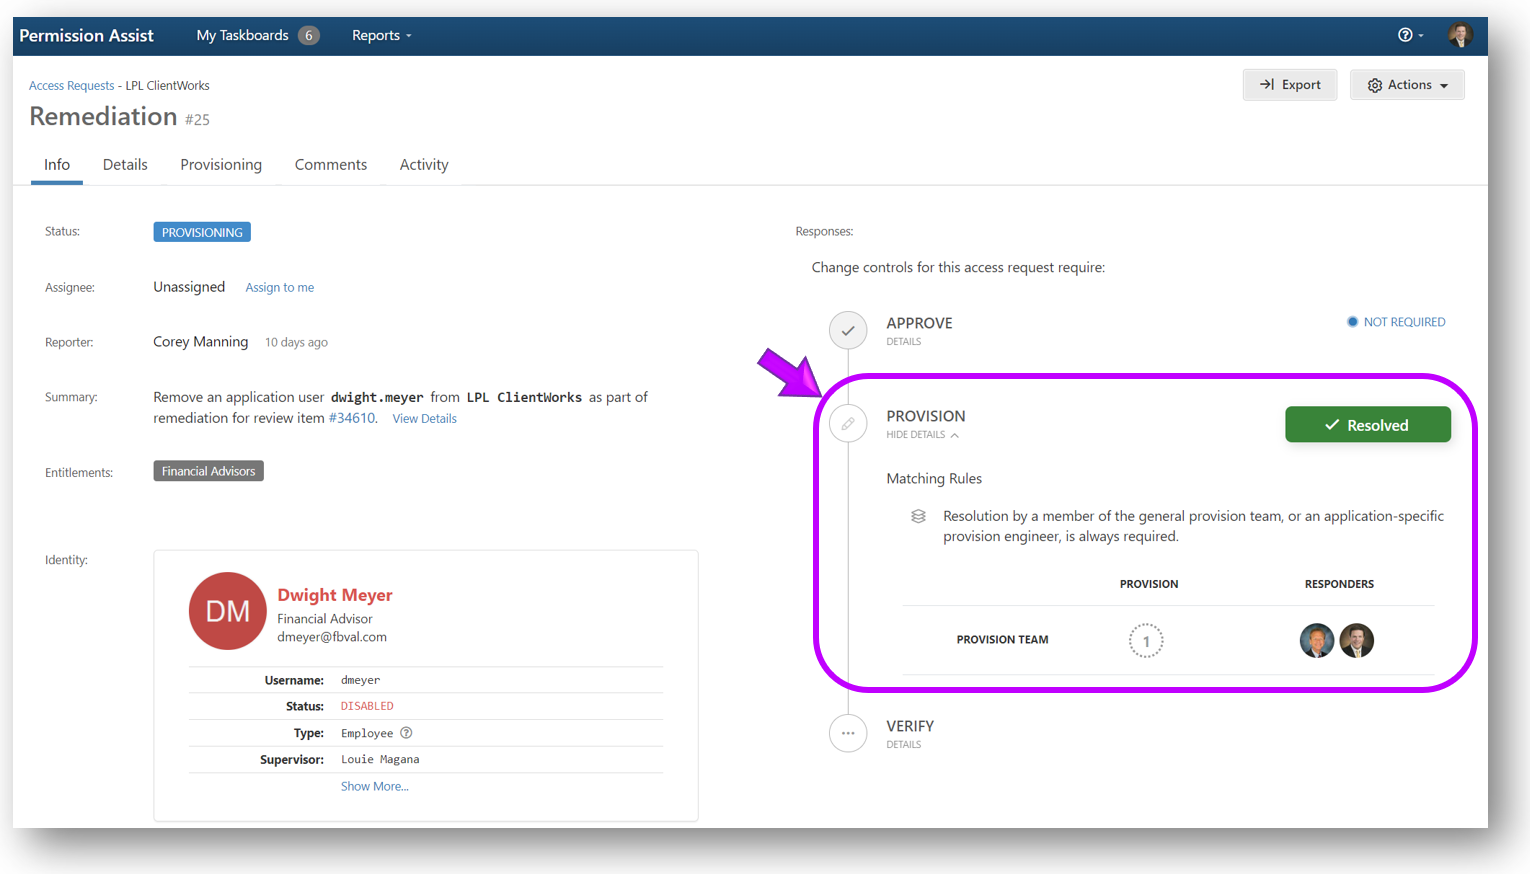
After resolving the request, it may be sent to the reviewer or others for post-verification depending on the workflow rules configured in System Configuration > Taskboards > Access Requests > Workflow tab.
If no verification is required, the status of the request is changed to Completed and the corresponding review item is marked as Remediated.
If verification is required, the status of the access request is changed to Verifying and the required responders are displayed in the Info tab > Responses area.
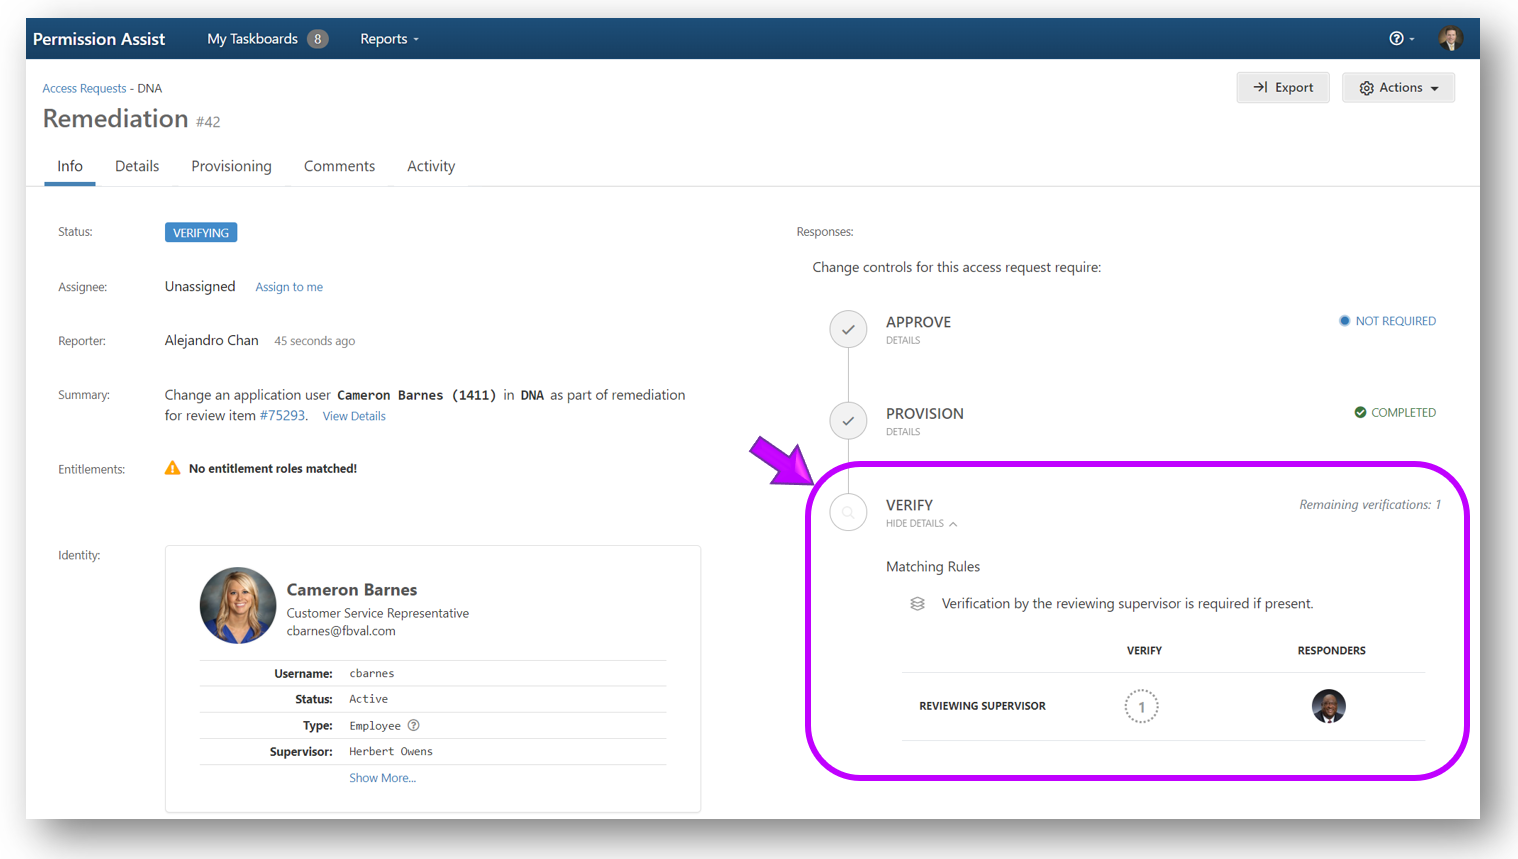
When post-verification is complete, the status of the request is changed to Completed and the corresponding review item is marked as Remediated.
Reopen provisioning
When an access request is in Verifying status, it can be reopened back to the Provision Engineer if additional provisioning work is needed.
To reopen provisioning, complete the following steps:
-
Select the Actions (...) button in the upper right corner of the request details page and pick Reopen Provisioning from the list. The confirmation window is displayed.
-
Enter
REOPENin the field and select the Reopen button. The status of the request is returned to Provisioning.