Import application security data
After an application has been added, the application security data for that application needs to be imported. Import data again before initiating personnel events or starting a review to ensure the most recent user and permission information is available. Data can be imported immediately or scheduled to import automatically.
Import data immediately
To import data, complete the following steps:
-
Go to the Manage menu and select Applications.
-
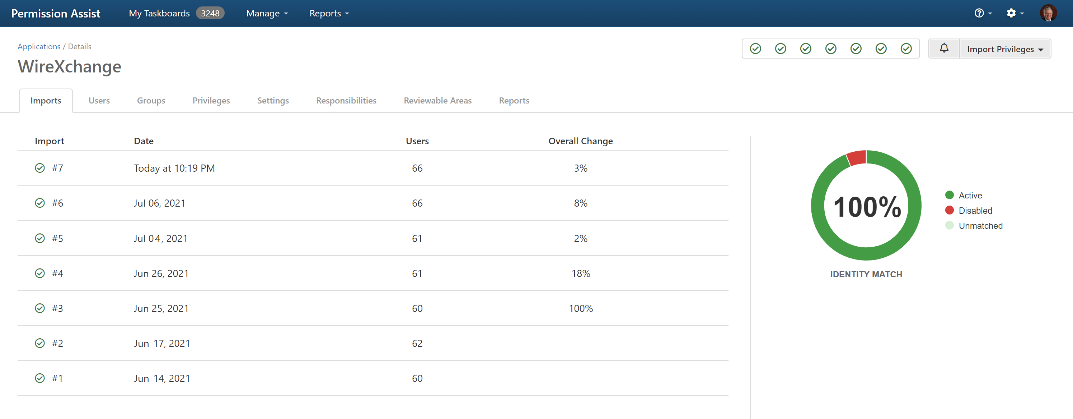
Select the application. The Application Details page is displayed with the Imports tab selected (see image below).
-
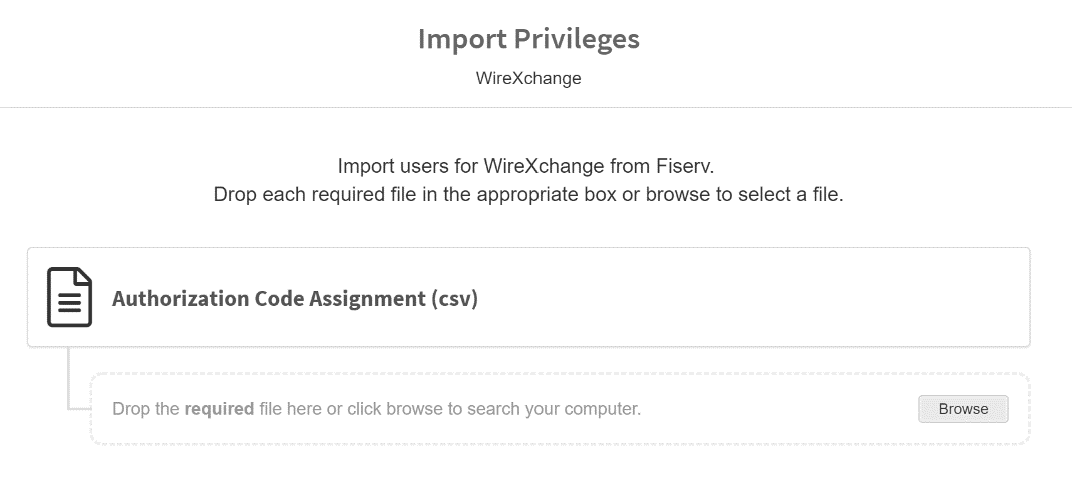
Select the Import Privileges button and select Import Now from the list. The Import Privileges page is displayed.
-
Select the Browse button and select the required file.
Note
Permission Assist does some preliminary verification of the file to help ensure the correct file is being loaded (the specific checks done on each file vary depending on the application and the file being uploaded). If the file passes the first set of verification checks, the box appears green. If the file doesn't meet the criteria needed, the box appears red indicating the file may not be the correct file. You can also select the file in another window and drag it into the box shown below the report name.
-
Select the Update button. The import data is loaded in the background.
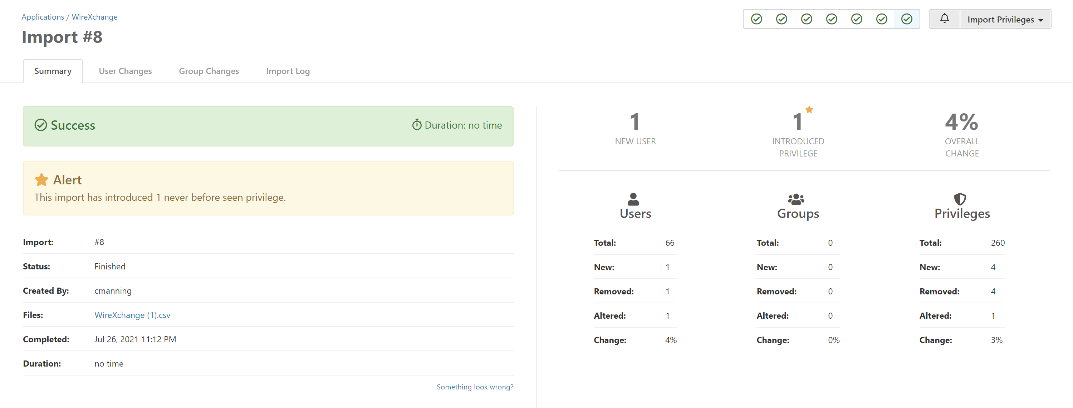
During the import, the system does a preliminary analysis of the data being imported. If the import is successful, the Import Details page is displayed showing a summary of the import including the number of new users, new privileges, and an overall percentage of change after the import.
Warning
If an import results in changes that go outside of the trend for that application (say for example an unusually large number of new users or new privileges are detected), the import is paused and you'll have the option to continue or cancel.
-
To view detailed results, see View import information.
Schedule automatic imports
Automatic imports allow you to configure a recurring schedule so that Permission Assist imports data without manual intervention. To set this up, save the import files to a folder that the server can access, then configure the schedule in Permission Assist. The files will be imported automatically on the day and time you specify.
Tip
Have the full file name and file path ready before you begin — you'll need to enter them when configuring the schedule.
Note
Permission Assist only allows automatic imports from locations that have been pre-approved by a Permission Assist administrator. Before scheduling automatic imports, the System Configuration > Applications > Imports area must be set up to ensure Permission Assist has access to the correct location of the import files.
To schedule automatic imports, complete the following steps:
-
Go to the Manage menu and select Applications.
-
Select the application. The Application Details page is displayed with the Imports tab selected.
-
Select the Import Privileges button and select Schedule Automatic Imports from the list. The Schedule Automatic Privilege Imports page is displayed (see image below).

-
Enter information into each field as follows:
Field Description Import users every day Used to determine how often data will be imported. By default, this field is set to "day" which means that information will be imported daily at the "starting at" time. To change the import frequency, select the "day" field and pick a new option from the list. Starting at 5am Select the time of day you want the import to occur. By default, this field is set to "5am." To change the time of day the import is started, select the "5am" field and pick a new time from the list. Network path Enter the location and name of the file (e.g., F:\ImportData\VendorName\ProductName\UserPermissionReport.xlsx). To test that the path and file name are working, select the Want to verify your file paths work? link. If Permission Assist is able to locate the file and the file is accessible (meaning the service account has permissions to access the file), a success message is displayed. If Permission Assist is not able to locate or access the file, a message is displayed with a description of the issue. -
Select the Schedule button. A success message is displayed in the upper, right corner of the page indicating that the imports are successfully scheduled to occur on a regular basis. When the success message is closed, the date and time of the next scheduled import appears in the upper, right corner of the page.
Related topics: