Request Leave of Absence

Leaves of absence are used when an employee is taking (or is expecting to take) extended time off for medical, military, or other reasons. After initiating a leave of absence, Permission Assist walks you through a series of questions. Refer to the sections below for more information about each step.

Who

Question/Option

Description

Who is taking a leave of absence?

Select the employee who is taking the leave of absence.

Tip: If you start typing the name of the employee, the list is filtered and easier to find within the list.


Beginning

This area is displayed after completing the required information in the "Who" step, and allows you to determine when the leave starts.

Question/Option

Description

When does the leave begin?

Select one of the following options.

Option Description
Immediate Select this option start deprovisioning as soon as possible.
Scheduled

Select this option if the leave is planned and provisioning work can begin on a future day/time.

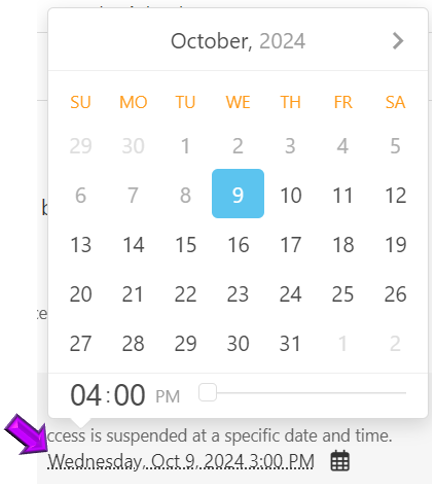
After selecting this option, click on the date and time link next to "Start suspending at" (see example below). Then, select the date and time the work needs to be completed.

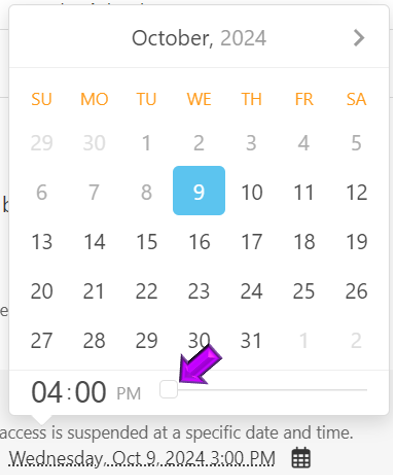
Use the slider to select the time the work needs to be completed (see example below).


End

This area is displayed after completing the required information in the "Beginning" step, and allows you to determine when the leave ends.

Question/Option

Description

When does the leave end?

Select one of the following options.

Option Description
Snooze

Select this option if you don't know the end date of the leave.

When this option is selected, you'll need to manually start the process to restore permissions when you know the end date.

Scheduled

Select this option if you know when the leave will end.

After selecting this option, click on the date and time link next to "Restoration needed by" (see example below). Then, select the date and time the work needs to be completed.

Use the slider to select the time the work needs to be completed (see example below).

Provision engineers may be able to start work on these requests early based on the number of days in the System Configuration > Taskboards > Personnel Events page.


Comment

This area allows you to add any additional notes, instructions, or comments that may be helpful for the Provision Team as they provision this leave of absence.

Any Additional Instructions or explanation?

Within this comments area you can enter comments and additional information. You can also:


After initiating a leave of absence request, Permission Assist walks you through a series of questions. Refer to the table below for more information about each step:

Question/Option

Description

Choose who is having a leave of absence

  1. In the Select an identity field, type the name of the identity or scroll down and pick the employee from the list.

  2. Select the Next button.

When does the leave of absence begin?

  1. Select one of the following options:

    Option

    Description

    Immediate

    Select this option if permissions need to be suspended immediately.

    Scheduled

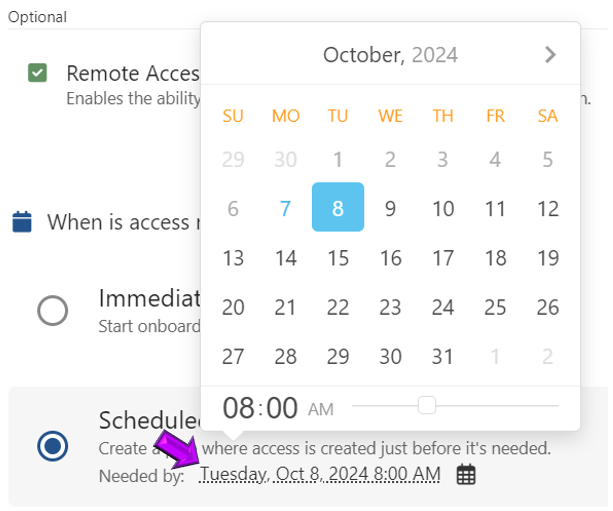
    Select this option if the leave of absence will begin at some point in the future. Then, select the underlined date next to the calendar to pick a specific date from the calendar(see picture below).

    NOTE: If the request is approved, provisioning requests can be rescheduled or the date can be changed to take place immediately, if needed.

  2. Select the Next button.

When does the leave of absence end?

  1. Select one of the following options:

    Option

    Description

    Snooze

    Select this option if the person's return date is currently unknown.

    Scheduled

    Select this option if the leave of absence is planned and the return date is known. Then, select the underlined date next to the calendar to pick a specific date from the calendar (see picture below).

    NOTE: If the request is approved, provisioning requests can be rescheduled or the date can be changed to take place immediately, if needed.

  2. Select the Next button.

Any Additional Instructions or explanation?

This area allows you to add any additional notes, instructions, or comments that may be helpful for the Provision Team as they on-board this new person.

Within this comments area you can:

When all information is complete, select the Request Change button. The request is created.