System Authentication
The System Authentication page within the System Configuration area allows you to determine who has access to Permission Assist and whether users can log in using single sign on.
Authorization Tab
Security Groups determine who has access to administrative, security, remediation, and reporting rights within Permission Assist. The System Authentication area allows you to assign Active Directory groups or users to Permission Assist Security Groups. The following table describes each group and what access is allowed for each group:
|
Group |
Description |
|---|---|
|
Administrators |
Members of this group have access to the following:
|
|
Security Team |
Members of this group have access to the following:
The security team does not have access to any System Configuration functions unless they also belong to the Administrators group. |
|
Provision Team |
Members of this group have full access to the features within the Change Management Taskboard and are be able to make decisions on remediation access requests for all applications. They do not have access to any other features within Permission Assist unless they also belong to another group. NOTE: If your organization has people that provision specific applications, you can also add provision engineers on the application's Responsibilities tab. Provision engineers assigned to a specific application can only provision access requests for their assigned applications. |
|
Personnel Managers |
Members of this group have access to the following:
|
|
Reporting Only |
Members of this group have access to view reports under the Reports menu and are able to view and print data for all reviews and applications. They do not have access to any other features unless they also belong to one of the other groups mentioned above. |
|
Impersonation |
Members of this group have the ability to log in and take action as another user. When someone logs in and takes action as another user, their actions are logged within the database. Impersonation data is retained for 18 months. |
There are other roles within Permission Assist that are not determined based on the groups on this page:
-
 Review Supervisors
In most cases, Permission Assist determines which identities are review supervisors based on whether they have direct reports assigned to them within your directory services application (Active Directory).
A person could also be given Supervisor access to Permission Assist in either of the following scenarios:
-
they've been assigned supervisor responsibilities for a user or group within an application
-
they've been assigned responsibilities on behalf of another supervisor
Supervisors have access to the following:
-
Review Items Taskboard – supervisors have access to reviews in which they are assigned tasks.
-
Change Management Taskboard – supervisors have access to see any access requests they send to the Provision Team. They cannot complete access requests unless they either belong to the Provision Team, they are a Provision Engineer for a specific application, or they are required to verify the remediation access request before the request can be considered complete (defined in the System Configuration > Taskboards > Access Requests area).
NOTE: Supervisors may have access to other features within Permission Assist if they also belong to another group.
-
-
Defined Managers
Permission Assist determines which identities are managers based on whether they have been assigned to an organizational unit on the Managers page.
Managers have access to the following:-
Review Items Taskboard – managers have access to reviews in which they are assigned tasks.
-
Change Management Taskboard – managers have access to see any access requests they send to the Provision Team. They cannot complete access requests unless they either belong to the Provision Team, they are a Provision Engineer for a specific application, or they are required to verify the remediation access request before the request can be considered complete (defined in the System Configuration > Taskboards > Access Requests area).
NOTE: Managers may have access to other features within Permission Assist if they also belong to another group.
-
-
Application Managers
Any identity in Permission Assist can be given the responsibility of being an Application Manager within an application. As an Application Manager, they will have access to the following:
-
Review Items Taskboard – Application Managers have access to the Review Items Taskboard and can view/take action on items only for applications they manage.
-
Applications – Application Managers have access to the applications they manage within the Manage > Applications area and can import data if needed.
-
Access Models - Application Managers have access to access models if the applications they manage are included in an access model; they can allow or deny permissions and commit changes only for the applications they manage (not for the access models as a whole).
-
Change Management Taskboard – Application Managers will be able to see remediation access requests related to the applications they manage. They cannot complete access requests unless they either belong to the Provision Team, they are a Provision Engineer for a specific application, or they are required to verify the remediation access request before the request can be considered complete (defined in the System Configuration > Taskboards > Access Requests area).
-
Reports - Application Managers have limited access to generate reports for the applications they manage.
NOTE: Application Managers may have access to other features within Permission Assist if they also belong to another group.
-
Assign Users to a Permission Assist Security Group
To assign an Active Directory group or user to a Security Group, complete the following steps:
-
Select a security group within the list. The details panel appears.
-
Select the Actions button (
 ) in the upper right corner of the details panel, and pick Add Identity.
 -
In the Select an identity field, type the name of the identity or scroll down and pick the identity from the list.
-
Select Save. The new Identity is displayed within the details panel.
To test that people have been given appropriate access, complete the following steps:
-
Select the Test Authentication button (
 ).
). -
In the username field, enter the identity's username as it appears in the directory source.
-
If you know the identity's password, enter the password in the Password field.
NOTE: This is optional. If you're able to enter a password, an additional test is run to confirm the password is valid. If a password isn't entered, the test is skipped.
-
Select the Test button.
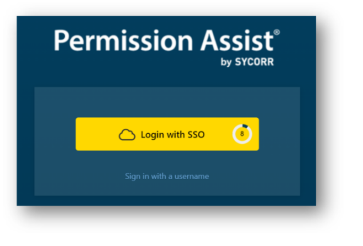
Single Sign On Tab
Permission Assist allows you to set up Single Sign On (SSO) through an OpenID Provider. To set up SSO, enter information into each of the following fields as needed:
|
Field |
Description |
||||||||
|---|---|---|---|---|---|---|---|---|---|
|
Preference |
Select one of the following options:
|
||||||||
|
Redirect Timeout |
This option is primarily used with the Preferred option described above, and determines how long people have to wait before they are automatically logged in to Permission Assist. |
||||||||
|
Instructions |
Use this field to enter a customized Login button when single sign on is enabled. For example - if you're using Workforce Identity, you could change the button name to say "Log in with Workforce Identity" |
||||||||
|
OpenID Provider |
The following OpenID providers are available:
|
|
Advanced Configuration |
|---|
|
Use the instructions on the right side of the page to complete the information in each of the Advanced Configuration fields. The fields of information within the Advanced Configuration area and corresponding instructions will vary depending on which OpenID provider is selected. |
When all information is complete, select the Save button to save your settings and enable single sign on.
Login Attempts Tab
This tab allows you view all attempts to log into Permission Assist within the last 90 days. Within this list, you can see who attempted to log in, whether the attempt was successful, and the request details associated with the attempt.
To search for a specific user, enter the user name (or part of a user name) into the Search field (see picture below).
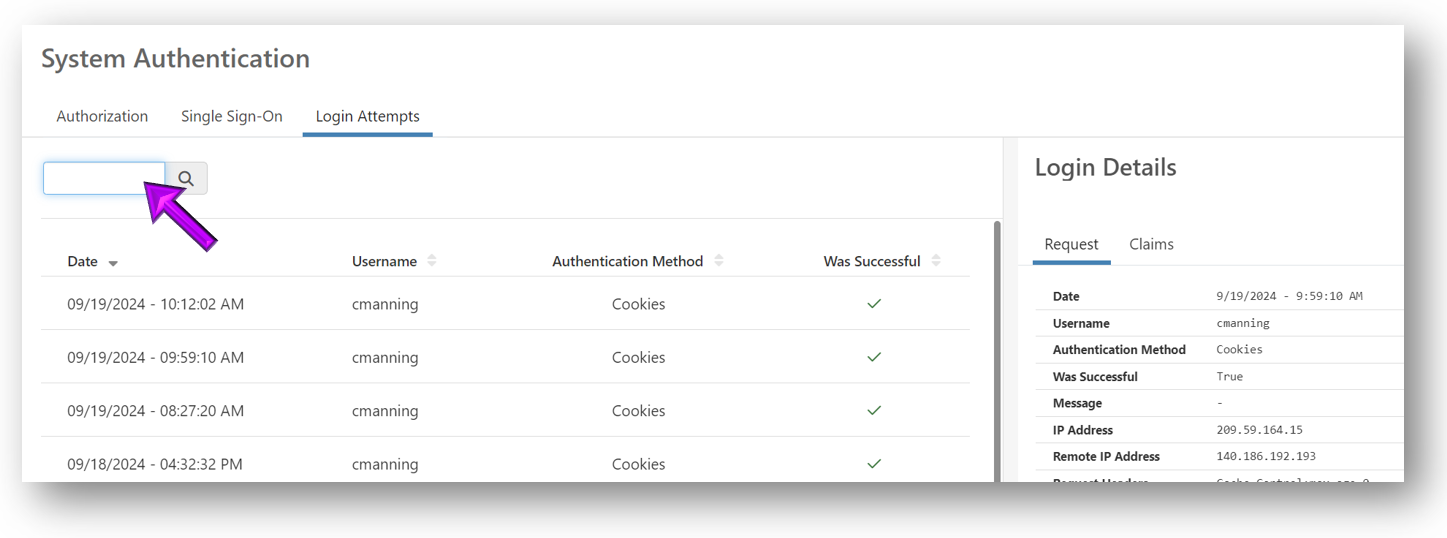
For each attempt to log in, the following information is displayed:
| Column | Description |
|---|---|
| Date | Displays the date the user attempted to log in |
| Username | Displays the username of the user attempting to log in |
| Authentication Method | Indicates whether they attempted to log in with cookies, which means they attempted to log in through the login page, or whether they logged in using an Open ID provider (SSO) |
| Was Successful | Indicates whether the attempt to log in was successful (true = yes; false = no) |
To view additional details about a login attempt, select an attempt within the list. The Login Details panel is displayed, which provides additional technical information that may be helpful for troubleshooting.